Make somethin’ Monday

New feature beginning today!
It was inspired by a little daydream I had this week . . .

I was remembering how years ago (when I was a new bride and then a new mother), it was very tough to find time to work on a craft project with any regularity. One day, a neighbor suggested I sign up for a Fall class on Floral Décor. She had gone the previous year and was excited to return. The class met one evening a week for 6-weeks. Sir Beads cheerfully offered to baby-sit.

Each week, we completed a project designed to be finished in a couple of hours. When the series ended I had six beautiful decorations. That class was truly a revelation to me. I realized that the secret to being creative in the midst of a very busy life was to “schedule” something – on the calendar!

curlyline

In the years that followed, my friends (who were also busy mothers) and I came up with the idea of holding a weekly “craft night” in our homes. We would take turns hosting the group and providing the refreshments. Sometimes we all worked on the same project. Other times we did our own thing, which was actually even better. It was amazing how enthused and inspired we became as we shared our designs and ideas.

Lately, I’m feeling the creative time crunch as much as I ever have. Why would that be? I mean the kids are grown and I’m no longer a new bride . . .

Of course, I do have a bead shop to run and then there’s a certain retired husband with whom I like to spend some quality time. The thing is, if I’m not creative – I begin to miss it quite a lot. So, the other day, during a light bulb moment, I remembered the “schedule” method and figured the blog could help me out!

“Yikes, Crystal, that was a pretty long-winded explanation to introduce the new feature: “Make somethin’ Monday

What can I say? You’re right. 😉

curlyline

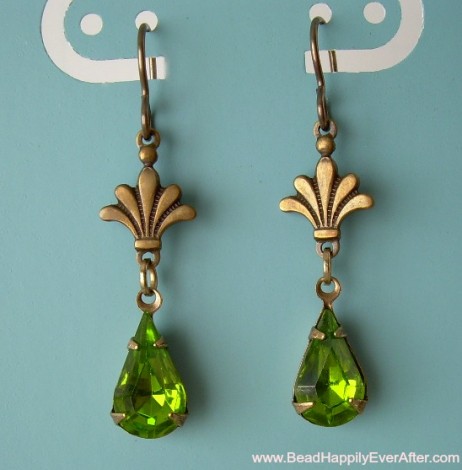
To begin the series, I have a pair of earrings – just finished them!

Now, you’re probably saying,

“Who are you and what have you done with Crystal!?!? Those earrings are more earthy and organic than Crystal usually makes – and they’re not even purple!”

They definitely are a departure… and I love them!

Maybe this scheduling thing is inspiring me already.

(The pear-shaped stones are vintage, made in Czechoslovakia. In order to make the earrings, I found suitable settings and then “set” the stones, myself. Fun! I will soon be carrying the vintage stones, in several colors, in my etsy shop.

Hugs,

crystal-1b3-copy-flatfullwidth

Baby It’s Cowl-d Outside

Remember just before Christmas when all my elves had quit, and I needed a break from the holiday prep, so I started an easy project to reenergize?

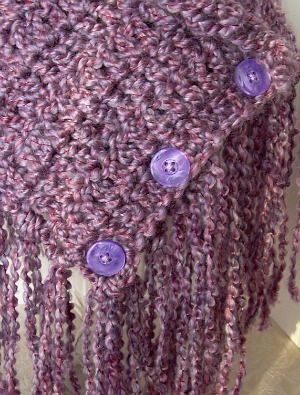
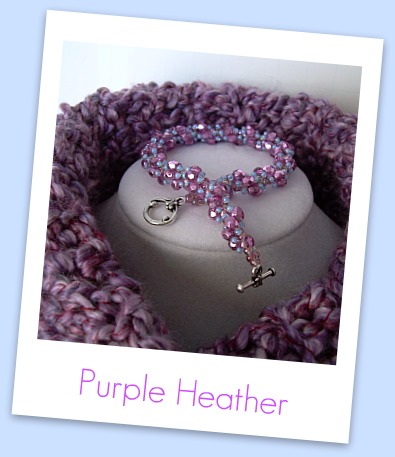
Well, here’s the result – a crocheted cowl “scarflette”! It’s just the thing for the chilly winds of January. I hope you can visualize how pretty it will drape on a person by viewing it here on my necklace stand.

Just imagine that there are shoulders on the necklace stand – so the scarf would be stretched a little wider across the neckline. (I knew better than to ask Sir Beads to model it! The man is a prince but he DOES have his limits.) 😉

The pattern (found here) is EASY and quick as a wink to make. I would have shown it to you a while ago, but I needed to shop for the buttons. Although the photo shows them as a lighter shade of purple, in real life they match exactly.

Here it is with the coordinating bracelet.

Next, I’ll make one in a burgundy suede yarn. I still have those crocheted pillows in the queue. Hours! I need hours!

Hugs,

crystal-1b3-copy-flatfullwidth

I made a card this week . . .

There are so many talented people making beautiful cards these days! I’ve often thought I’d like to try it.

The process appeals to me because it’s a mini version of making a scrapbook. You use a lot of the same tools and supplies but you are finished much sooner. I know I wouldn’t have the stick-to-it-ive-ness to complete a large scrapbook.

As I’ve mentioned to Carol, I am not good at working on a weeks-long project. With most of the arts that I’ve learned, I try to do small projects otherwise they tend to languish in an unfinished state. Guess I like the old instant gratification! For example, if I were quilting – it would be placemats – not a queen-sized quilt! When making a card, I can play with all of the pretty papers, stickers, ribbons, and rubber stamps – and still have a finished project fairly quickly.

Last week, as Valentine’s Day was approaching, I planned to make a few Valentines – but time ran out.

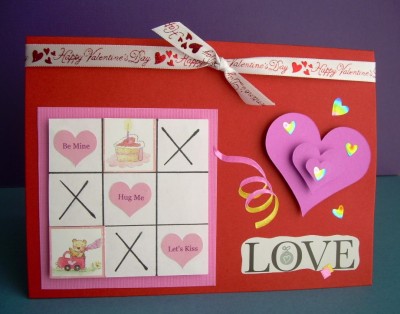
Made only one . . . for my Valentine . . . of 37 years . . .

I was in kindergarten when I married don’t cha know. 😉

valcard

It turned out OK, for a beginner. You can click on the photo to make it larger.

It was fun and actually reminded me of my earliest school years, when our class would spend an afternoon every week making little “art” projects with colorful construction paper, glue, and our blunt edged scissors.

Now if you were to ask me what I liked best about making this card, I’d have to say . . .

He liked it!” 🙂

crystal-1b3-copy-flatfullwidth

Gingerbread Girl Pattern

hearts-border2

Valentine’s Day will be here in about ten days!

Do you need a small gift for a sweet person in your world? Maybe one of the kids has an extra-special teacher, or you have a wonderful neighbor who gathers your mail when you’re away on vacation?

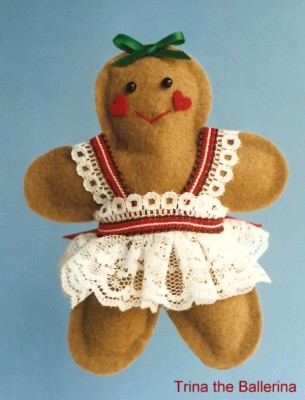
How about making this little lady and attaching her to a small box of chocolates for a Valentine’s Day surprise?

trinaballerina2

She’s a gingerbread girl who loves to dance! 🙂

This project is quick and easy! It’s made of felt and scraps of trims/lace/ribbon that you probably have around the house already, if you are a sewer. But if you’re someone who hates to sew – no problem – the directions cover “gluing” the doll, instead! Trina makes a perfect tree ornament too. Maybe you’ll decide to make a few extras for next Christmas!

Gingerbread Girl
©2009 BHEA

Please Note:
This is a decoration only and is not suitable for small children!

Supplies Needed:

9″ by 6″ piece of brown felt
2″ by 2″ piece of red felt
2 small black beads
12″ red embroidery floss
10″ ribbon – 1/8″ wide
10″ ribbon – 1/4″ wide
20″ flat lace – 1-1/4″ wide
15″ decorative trim or braid
small amount of polyfil stuffing
12″ thin gold cord for a hanging loop

For full-size pattern pieces and complete instructions, click the following link:

gingerbread-girl-pattern

Have fun experimenting! Dress “Trina” in a different style if you wish. Add a little hat, a feather boa or even some jewelry/bling. You could also make a gingerbread “boy” with a felt vest and bow tie! I’d love to see a picture of your version. 🙂

crystal-1b3-copy-flatfullwidth

Valentine Hearts of Lace

It’s true that Christmas was only a few days ago but . . .

Valentine’s Day will be upon us in the blink of an eye!

So, in honor of the occasion, I thought you might like another quick and easy-to-make ornament!

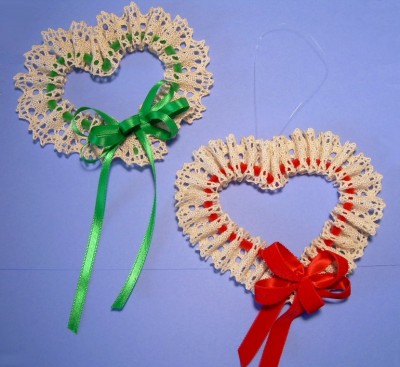
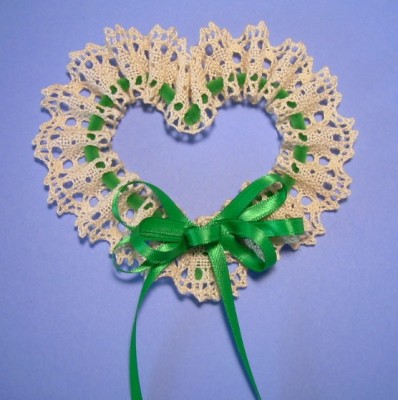
These airy little hearts only look as if they are hand crocheted! Actually, they’re a cinch to make with cotton cluny lace and chenille stems. So pretty hanging in a window, but they’re also perfect to tie on a gift!

laceheartvalentine1

Use any color scheme you like.

For Valentine’s Day, I love the traditional red or pink colors, but this green one makes a great Victorian-style Christmas ornament! (Burgundy or Plum would be beautiful, as well!)

lace-hearta

The secret is the cotton lace that you can find online at Home-Sew – a great source for lace, trims, ribbon, and other goodies. (The lace may also be available at a fabric store near you.)

Materials Needed:

*One 12” chenille stem (pipe cleaner)
*22” piece of 1-1/4 inch-wide cotton cluny lace
*1 yd. of 1/4″-wide satin ribbon.
*Fishing line or embroidery floss for hanger
*Tacky glue

Instructions:

NOTE: Read through all directions before beginning.

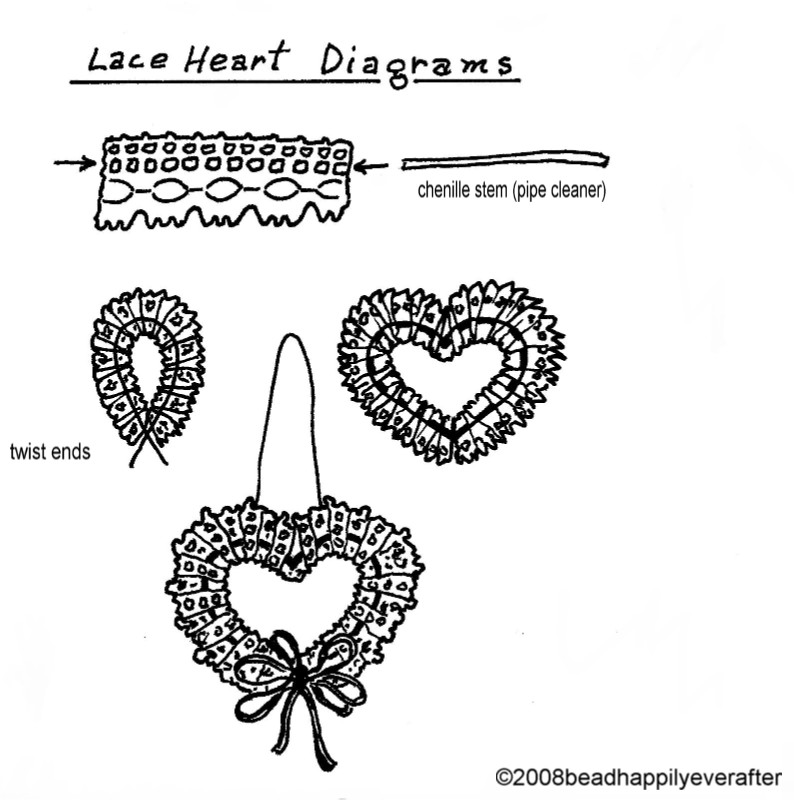
1. Thread the chenille stem through every other hole in the 2nd row of holes on the lace – see diagram.
2. Adjust the gathers evenly and bring the ends of the chenille stem together and twist 2-3 times.
3. Cut off excess chenille stem ends. The point of the twisted ends forms the point of the heart.
4. Shape the stem into a heart and adjust the gathers again if needed.
5. Make a loopy bow and glue to the bottom of the heart.
6. Attach fishing line hanger.

lace-heart2

When finished, the heart measures 5-1/2″ across.

If desired, you can make smaller hearts by using half of a chenille stem and an 11″ piece of 7/8″-wide lace.