Grape Jelly Slinky

grapejellyjarWhat looks like Grape Jelly….

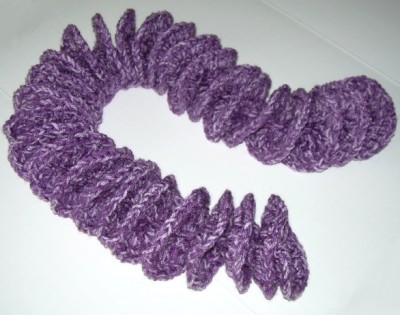
slinkymovingAnd moves like a slinky?

Why it’s my new scarf! 😉

slinkyscarf

I love the way it turned out!

slinkyscarf2

Scarves of all kinds are fun to wear, but sometimes a long scarf can get in the way. The nice thing about this shorter style is that it will fill-in that open area inside your coat’s collar (so your neck is snuggly warm) without adding a lot of extra bulk. It’s really pretty enough to wear indoors too – maybe to cover a neckline that’s too bare for winter, or to jazz up a crew neck sweater.

This was one of my TV Time projects, so the pattern is an easy one! It’s crocheted and you can use any yarn and hook size you choose.

I used:
(1) 6 oz. skein of soft, medium weight, acrylic yarn in variegated violet. (I have about half of it leftover.)

Hook Size: J

Several of you ladies have said that you don’t crochet, but wish you did. If you ever decide to give it a go, you’ll discover that it really isn’t difficult. Just search on youtube for some basic “how-to-crochet” videos. All you need is a ball of yarn and a hook.

You can do it! 🙂

crystal-1b3-copy-flatfullwidth

I Heart – Hearts!

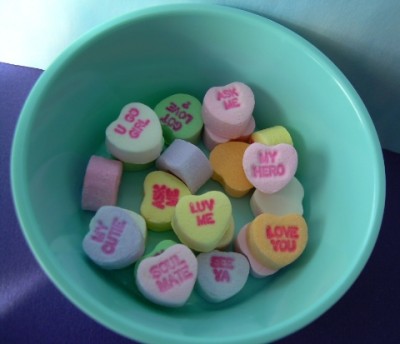
Last week, Sir Beads brought home a bag of these . . .

ConversationHearts

We both remember them fondly from when we were kids.

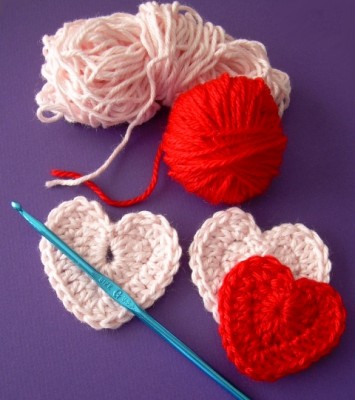
Having them around the house (and eating them of course) put me in the mood to make a small heart of some kind. I decided to do a search for “crochet heart” and came across this pattern. I made a few one night while watching TV.

Crochet Hearts

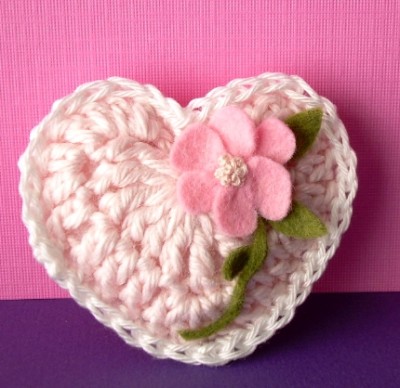
The pattern mentioned making a garland of them, but I wasn’t sure I wanted to do that. I started thinking of the conversation hearts again and one thing led to another. I began by sewing on a felt backing and then cut some felt scraps to make a flower.

crochetheartflower2

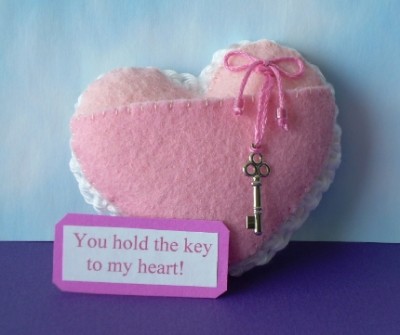
But, what does this have to do with conversation hearts you ask? Well, I had an idea to make a “pocket” on the reverse side to hold a little message.

crochetheartflpocket

And here’s the final result . . .

crochetheartflpktkey2


The nice thing is that the felt version has no calories! 😉

crystal-1b3-copy-flatfullwidth

Elf Wanted!

candy_caneWith only 15 days until Christmas, things are really getting busy now.

I’m beginning to think Santa has the right idea though . . . I need an elf! 😉

You know – just to help with a few things on my list. Maybe he could do the laundry and the grocery shopping, so that I could concentrate on all of the fun holiday stuff. Yes! That would be perfect.

In the midst of the bustle and merriment of the Christmas preparations here, I still like to have a moment to make something – just for the fun of it. It keeps me calm! LOL

Consequently, I’m always on the lookout for a quick and easy project, and when I saw Donna’s version of a sweet but tiny purse, I wanted to make one, too! She very kindly included a link to the directions!

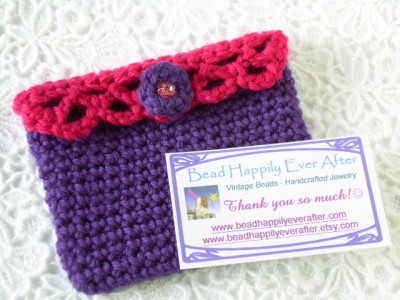
Here’s mine. I put the business card with it to give you an idea of the size.

DSCN5101

Wouldn’t it be just the thing to give with a gift card tucked inside?

I used some leftover wool yarn scraps and then crocheted the button as per the directions. I added a Swarovski crystal for a little pizzazz. (You can click on the photo to enlarge it.)

Although I didn’t have a real button on hand that would coordinate with this purse, I do think a vintage or new button would be lovely on the next one I make. Some glitzy yarn and a jeweled button would be gorgeous for an evening bag – when all you might want to carry is a lipstick and maybe a credit/debit card.

Ok, back to decking the halls for me.

‘Til next time,

crystal-1b3-copy-flatfullwidth

12 Ornaments of Christmas – Part 7

toys2

I have a riddle for you! 🙂

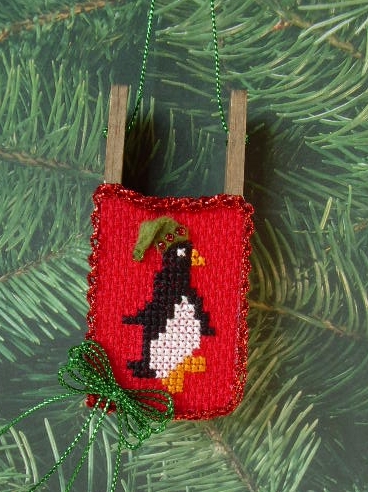
What do you get when you take this . . .
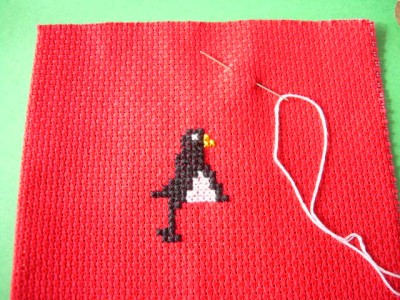
penguinx-st

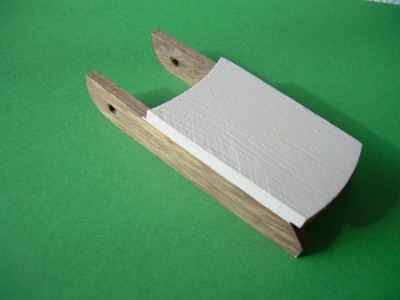
And add it to this?

sled

Answer: A unique handmade Christmas ornament! 😉
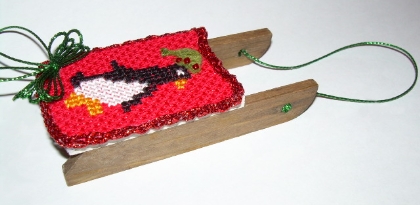
PenguinOrnza

PenguinOrnz

The 7th ornament in this series is a little wooden sled that I’ve decorated with a small piece of cross stitch – but you could choose any number of other ways to embellish it including a crocheted motif, or embroidery, sewing, pieced felt, papercrafts, or even decorative painting. The idea is to use a winter or holiday item, like the sled, and decorate it in an unusual way to create a very special ornament!

Supplies:

penguinborderc

small wooden sled (available at craft stores)
tiny cross stitched design of your choice
scrap of felt for hat
small beads (seed beads for hat, 4mm bead for pom pom)
glittered ribbon cord for hanger and bow
small piece of decorative braid or trim
tacky glue

Directions:

penguinborderc

You’ll notice my sled has been stained and painted – which is NOT necessary. Leaving it natural is perfectly fine, or you may decide to paint your sled a bright color.

Stitch the design of your choice in cross stitch.

Lay the finished stitching on the table face-up. Place the sled (seat side down) on top of the stitching. Be sure it is centered and trace around the sled (directly onto the fabric) so that you will have the traced outline as a cutting guide.

Cut on the line and after placing a thin layer of tacky glue on the top of the sled, attach the stitching to it. Press firmly and allow to dry.

Use a piece of cord to make a “pulling rope” for the sled.
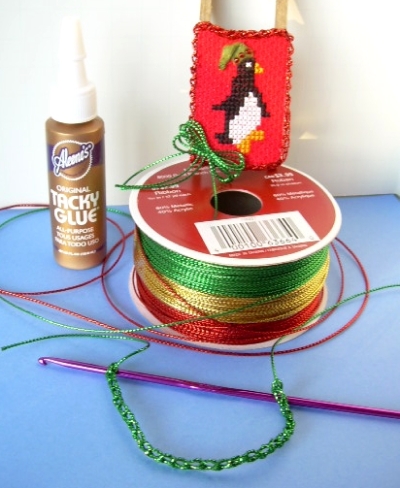
penguinsuppliesz

Optional:

penguinborderc

I made a hat for the penguin by cutting a small triangle of felt and sewing it in place. I folded the top corner over and attached a crystal pom pom and a few seed beads for sparkle!

I decided that the cross stitch design could use a border of some kind. Since I didn’t have any suitable decorative trim on hand, I took a piece of the glittered ribbon cord and crocheted a “chain” to glue around the edges of the sled. A small bow in the lower left corner was the finishing touch.

candy_caneYou’ll have lots of your own ideas, of course, but I hope this will inspire you to look around for something you have there right now, that could be used to make a unique ornament. 😀

crystal-1b3-copy-flatfullwidth

12 Ornaments of Christmas – Part 6

toys2

Part 6 in this series is technically not an ornament but an ornament hanger! Actually, they’re so pretty; they could almost stand alone as ornaments if you wish. 🙂

But imagine how dazzling your tree would look if you used a bunch of these little sparklers to hang your ornaments!

hangerszz

And talk about quick and easy! I made them in just a few minutes.

Supplies Needed:

1. A few pretty beads!

2. Medium gauge wire

3. Pliers

4. Wire cutters.

Directions:

1. Use wire cutters to cut a 5″ piece of wire. (You may decide you want your finished piece to be smaller. In that case, experiment with shorter lengths of wire until you arrive at the size you like best.)

2. With pliers, make a flat spiral shape on one end of the wire. (See photo for guidance.)

3. Next, thread your beads onto the wire in a pleasing arrangement.

4. Finally, bend the top of the wire to form a small loop, and then wrap the rest of the wire around a pen to form a “hook” shape. (Again, refer to the photo.)

That’s it – all ready for the tree!

Perfect for gifts, too!!! If you’re giving a fancy glass ornament – make a lovely hanger to accompany it, or make a set of them for a teacher, hostess, or that “hard to buy for person” on your list. 🙂

crystal-1b3-copy-flatfullwidth