Ornaments to Make: ‘Santa’s Slipper’

The days are flying by but there’s still time to make a few Christmas ornaments – especially if they’re quick and easy!

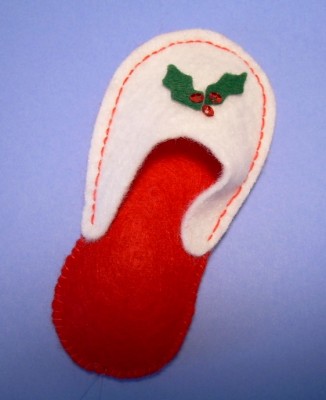
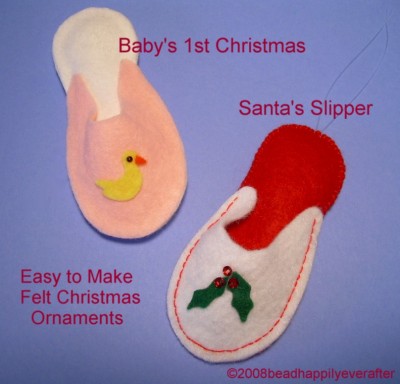
Here’s a little slipper that looks really cute on the tree, and you can even make a pink or a blue version that would be adorable for Baby’s 1st Christmas!

santasslipperb

If sewing isn’t your thing – never fear! You can use glue, instead. Make a few and use them to decorate your packages, or present one with a plate of homemade cookies. Your lucky recipient will have a wonderful handmade keepsake, and will think of you every year as it’s placed on the tree!

~ Instructions ~

Sew or Glue – it’s up to you! Both methods are given below.

Materials Needed:
1 square red felt
1 square white felt
scrap of green felt
Red sequins for “berries”
fishing line or embroidery floss for hanger
tacky glue

DIRECTIONS:

NOTE: Read through all directions before beginning.

1. Trace all patterns and cut out as directed on the pattern pieces. You’ll find full-size patterns by clicking on the “santas-slipper-pattern” link at the bottom of this post.

2. Place a line of glue around outer edges of one slipper sole – except for the area between #1 and #2 shown on the pattern piece – and then place the second slipper sole on top of the first; allow the glue to dry. If you prefer to sew: Use a whip stitch to sew the two sole pieces together – except for the area between #1 and #2 (shown on the pattern piece).

3. After the glue has dried or you have finished sewing the soles together, stuff lightly and glue or sew the opening closed.

4. Place a thin line of glue on the sole of the slipper between #3 and #4 and glue the slipper top to the sole — matching edges carefully. The top will have a rounded effect as if to fit a foot. If you prefer to sew: Use a backstitch in contrasting thread to attach the top of the slipper to the sole, matching edges carefully to create a rounded slipper top.

6. Glue holly leaves & “berries” as shown.

7. Attach a hanging loop of fishing line (or embroidery thread) to the heel end of the slipper.

For full-size pattern pieces, click the link below:

santas-slipper-pattern

Easy to Make Christmas Ornaments

This year, many of us are trying to cut back on our Christmas spending, but maybe we’d still like to give a little something to a friend, neighbor, co-worker, holiday hostess, teacher, or the hair stylist!

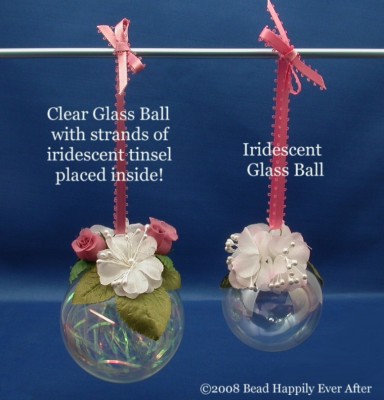
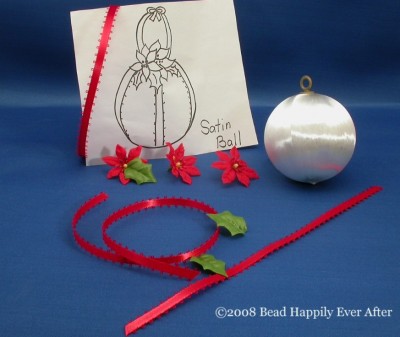
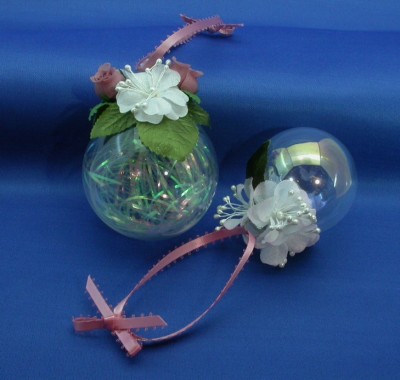
Here’s a quick and easy ornament that you can make pretty inexpensively. The supplies you purchase will probably be enough to make several, so the average cost per ornament will be quite reasonable. The basic ingredient is a plain Christmas ball, but it’s the colors, textures and embellishments you select to decorate it, that will make this a very special gift!

This idea would also be perfect for those of you who like to help your kids make presents for their grandparents and teachers. The instructions are simple but the finished result can be quite elegant! Please be sure to supervise children on this and any other craft project.

Supplies Needed:

1. Christmas Balls – Either clear glass, iridescent glass, colored glass – or even the unbreakable satin ones look really lovely and are a good choice if you are working with children.

(If you are using clear glass balls, you can carefully remove the top of an ornament and poke several strands of tinsel inside for a little extra special sparkle on the tree! Use a straw or plastic coffee stirrer to arrange the tinsel, and then replace the cover.)

2. An empty egg carton to keep the balls from rolling around as you work on them and also to hold them while they’re drying!

3. Ribbon – 1/4 inch wide in your choice of colors.
Picot edge ribbon is pretty (as seen in the photo) but the plain edge ribbon will also work.

4. Small clusters of silk flowers in your choice of colors, silk leaves. You can also use other tiny decorations such as mini candy canes, miniature bells, little pinecones, etc.

5. Miscellaneous: You might also like to experiment with tiny strands of seed beads, narrow lace, or decorative trim when decorating the tops of the ornaments.

6. Tacky glue is a must! Or, you can use a glue gun if an adult is operating it. (Please note that regular glue sticks and Elmer’s glue are definitely NOT strong enough for this project.)

Instructions:

1. Ribbon wrapped around the ball looks especially pretty on the satin balls.
You may decide to skip this first step if you are using the glass balls, however!

Place a narrow line of glue on the first few inches of ribbon and begin to glue it to the ball starting at the top near the hanging ring – and then gradually add glue to more of the ribbon as you wrap it all the way around the ball ending at other side of the top. Glue a second piece of ribbon in the same manner but opposite the first ribbon and be sure that it’s evenly spaced on the ball.

2. Now for the fun part! Decide how you want your flowers, leaves, etc. to be arranged and then, one by one, glue them in place using a generous little dollop of glue for each piece.

3. Leave the ornaments to sit upright in the egg carton for a little while so that the glue can dry thoroughly.

4. Finally, for a hanger – use matching ribbon and loop it through the ornament ring. Tie the ends of the ribbon in a knot, leaving enough ribbon to then make a small bow.

Finished! Isn’t it pretty?

Remember to make one for your own tree, too 😉

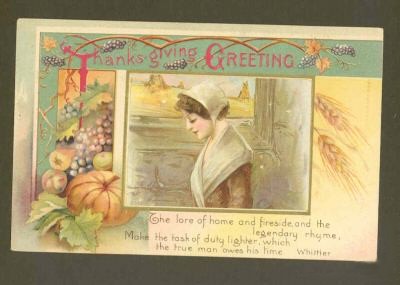
Happy Thanksgiving

At this time of year, I’m always reminded of a cute poem that my youngest learned in kindergarten. As you read it, try to imagine an enthusiastic 5-year-old reciting it with dramatic gestures, animated facial expressions, and an excited little voice!

~Thanksgiving Day~

“Thanksgiving Day is coming”
So Mr. Turkey said,
“And very careful I must be
or I will lose my head.”
The pumpkin heard the turkey,
“Oh, goodness me, oh my,
They’ll mix me up with sugar and spice
And I’ll be pumpkin pie!”

*************************************

HAPPY THANKSGIVING, EVERYONE!

Warmest wishes to all for a holiday filled with fun and many happy memories . . .

Sweet As Can Be! Snowman Cupcakes

I have 3 brothers and 2 sisters, and when you add all of the husbands, wives, and kids in our extended family, there are usually about twenty-five of us on Christmas. It’s a fun-filled event and we look forward to it each year.

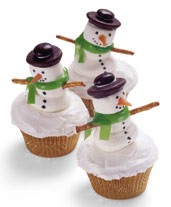
Everyone brings food to share – usually a favorite dish or dessert. A couple of years ago, I decided that I’d like to bring something new. I came across these little snowman cupcakes and I just couldn’t resist them! Aren’t they cute? Here’s the photo that’s included with the recipe.

cupcake-frosty

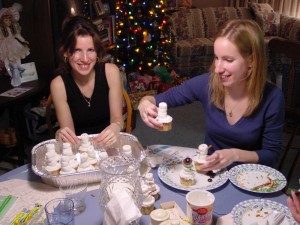
But I also have a few pictures of our attempt to make them, and a little bit of advice for anyone who wants to give them a try this year. First of all, I implore you to make them a couple of days ahead of time! Please don’t wait until the night before, as we did. Talk about pressure! Silly me had the idea that it would be a relaxing thing that my daughters and I could do after dinner on Christmas Eve. Fun, it definitely was! But relaxing? Not so much!

Once we realized exactly how time consuming it was going to be, we even enlisted my husband to make the “snowman scarves”. At that point, it truly became a family affair!

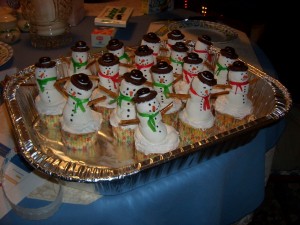
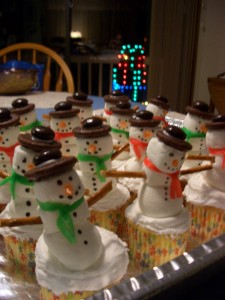
The assembling of each snowman took a little practice, so it was slow going at first. But once we got the hang of it, we were working in an assembly line fashion, and the little fellas began to multiply quickly. Here’s our finished version. Notice that one of them is winking at you.

Click on the photos to make them larger.

Click on the photos to make them larger.

In the photo below, it’s almost midnight – almost Christmas!!! The snowmen are all packed and ready to travel 🙂

One last thing though . . .

Hopefully, yours will be served at home – or at least somewhere in the neighborhood. Our stress was not totally over until we completed the 2-hour car ride to my brother’s house on Christmas Day! We all gasped at every bump and pothole along the way, but fortunately the little snowmen survived the journey without incident and they looked quite festive at the family gathering 🙂