Bears Can Knit, Too!

On your gift-giving list, is there a bear collector, or a knitter, or maybe someone who just loves tiny treasures?

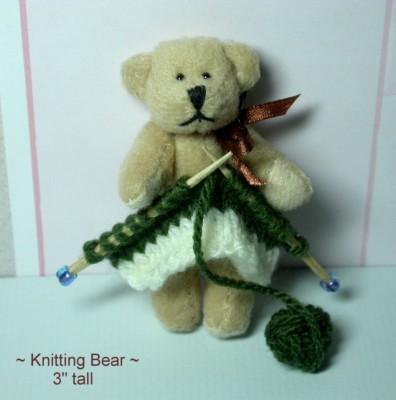
Well, this mini teddy bear might be perfect for all three! Whether he decorates a birthday package or is a “gift” all by himself, he’s pretty hard to resist!

bear1

You can finish this project quick as a wink by using a 3″
pre-made bear. The knitting is done on full size knitting needles (size 1) and then transferred to tiny “bear-sized” knitting needles – made from toothpicks!

“Knitting Bear” Tutorial:

Supplies needed:

3” Bear – from your local craft supply store (I found mine at Michael’s)
A scrap of 1/8” ribbon for a bow at teddy’s neck
Assorted remnants of sport weight yarns
Size 1 Knitting Needles
2 round wooden toothpicks
2 size-5/0 beads (or any bead that fits the toothpick)
Tacky Glue

Directions:

Tie a bow at Teddy’s neck and then set him aside.

Using size 1 knitting needles, cast on 15 stitches in your choice of color.

Knit in stockinette stitch for 3 rows, then change colors for 3 more rows. If the knitted piece seems long enough, (depending on your yarn and tension) cut the yarn – leaving a one-yard piece, which will be rolled into a little ball of yarn.

Carefully put half of the stitches on one toothpick, and then the rest of the stitches on the other – moving them slowly to avoid losing stitches in the transfer!

Once you have transferred the stitches, the toothpicks may need a little trimming if they seem too long or are too fat for the beads to slip onto easily. I trimmed mine a bit with the tip of my wire cutters. The wood is soft and trims easily.

Next, glue the beads onto the toothpick ends.
Bring the hanging piece of yarn over the needles to the front, and roll it into a ball – starting at the end of the yarn. Use a little glue here and there to hold the round shape.

Any loose strands on the back of the knitting can either be woven in, or snipped close to the work and secured with a dab of glue.

Finally, place the piece of knitting in the bear’s paws and glue it to his chest area with a generous little dollop of tacky glue. Let dry.

Finished!!! Aww . . . isn’t he sweet?

crystal-1b3-copy-flatfullwidth

Friday Favorites

hearts-border31
I know, I know! We’re a week into the New Year already, so why am I showing something Christmassy for this week’s Friday Favorites?

Well, just before I close the holiday posts, I thought you might like to see my favorite gift given this year!

dscn7156a2

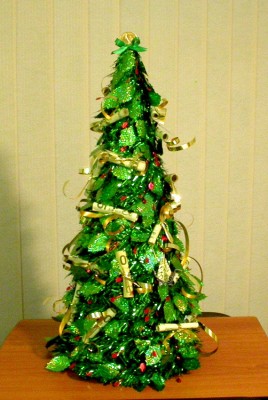
This Christmas version of a money tree was lots of fun to put together for my Mum & Dad. Every year it becomes harder and harder to figure out what to give them. They have 6 grown kids buying gifts for them, so the good ideas are dwindling. They don’t need any more knick-knacks!

dscn7168

This year, I decided to give them money, but I wanted to do more than just put it in an envelope. Money trees are nothing new, but I thought a Christmas money tree might be fun and a little out of the ordinary.

dscn7167

I found this pretty tabletop tree with the idea that they could re-use it as a holiday decoration in the future. It’s showy but doesn’t take up too much real estate when in storage!
dscn71661

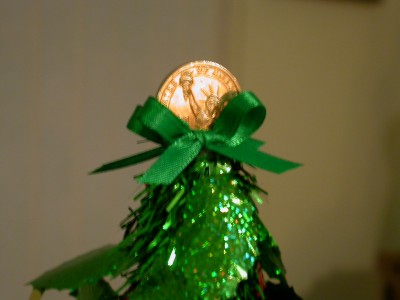
We gathered an assortment of bills in different denominations, rolled each one, and tied them to the branches with gold curling ribbon. As you can see, a dollar coin with little green bows served as the tree topper! (Yep, that’s Lady Liberty holding her torch.)

For the final touch, I printed a small hangtag that read: “Sometimes money does grow on trees!”

Actually, I wanted to show this to you right after we put it together, but that might have spoiled the surprise for Mum & Dad – they’ve been known to stop by the blog now and then! 😉

crystal-1b3-copy-flatfullwidth

Holiday Gifts in a Tough Economy

With the gloomy economic forecasts of late and the jittery drift of the stock market, many of us are worrying that we’ll see our 401(k)s shrink into 201(k)s!

The timing couldn’t be worse with the holidays just around the corner.

Cheer up though – there’s a silver lining. This year we have the perfect excuse to scale back on the holiday spending spree, once and for all.

“What kind of humbug is that?” you ask.

Fear not! I’m not suggesting we abandon gift-giving entirely, but that we return to basics and emulate our thrifty ancestors by making as many of our gifts as possible.

With a bit of determination and your creative ability, you may be surprised at what you can create on a limited budget.

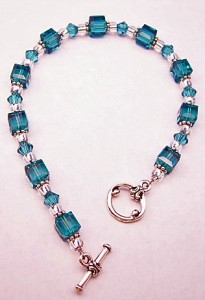
With only about 65 days until Christmas, there’s not a minute to lose! Begin by making your list and dividing it into gender and age groups. It will save you time and money. For example, if you decide that all of the teenage girls will be getting handcrafted bracelets, you can buy the supplies in bulk, and work on the pieces in an assembly-line fashion.

To further economize, visit the Dollar Store for your wrapping materials. They have a wonderful assortment of papers, gift bags, tags and ribbons; and there’s nothing more festive than a beautifully wrapped gift!

You may be surprised to see more smiles than ever this year, as you present your special handmade treasures. And, who knows, it could just be that you’ll have started a new “back to basics” tradition in your family!

©2008 Bead Happily Ever After