An Extra Hour…

fallclockSo remember on Saturday, when I was suggesting that we all try to do something fun with our extra “fall back” hour? Did you find a little time just for you? I hope so! I decided to make a potholder.

bowdividerblue

I know! That probably would have been your last guess for how I’d spend my extra hour. Well . . . it happened quite by accident. I was searching for something on the internet. You know how that goes. You begin to google a specific item and before you know it, you are lost in cyberspace – reading all kinds of interesting information! When you eventually come back to consciousness, you realize that you hardly remember what started the whole thing! 😉

bowdividerblue

Anyway, I bumped into a forum where there was a discussion about crocheting potholders, and how one particular potholder was so much fun and so very quick to make. According to the post, you crochet it in one piece that will fold in on itself as you go along and when complete, you’ll have a square with a double thickness. Needless to say, I was intrigued.

After I had finished several rows, I thought it was looking more like a little clutch purse than a potholder!

potholderbluedenim2

Ah, but then the “magic” began – it was starting to turn into a square. More rows would be needed before I could sew a seam to form the last two corners, though.

potholderbluedenim1

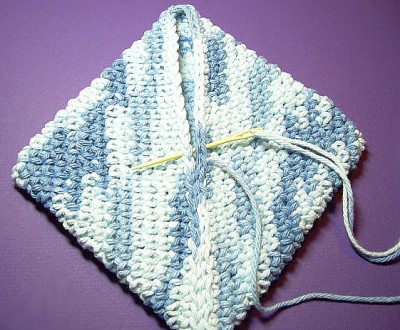
With a little more patience and several more rows, this potholder was now a square.

potholderbluedenim3

After finishing the seam, I added a loop for hanging and Voila! Although I love pretty, decorative potholders, I always hate to use them. This, however, is a “working” potholder. It’s nice and thick and should offer good protection for handling hot items.

potholderbluedenim

I used Lily Sugar ‘n Cream Cotton in “Faded Denim” and a size G crochet hook. You can find the pattern here. I think if you make one – you’ll make another. It’s a great project to work on while watching TV. 😀

crystal-1b3-copy-flatfullwidth

Make a Mini Scarecrow

autumnYears ago, I used to sell a variety of handcrafted items at artisan fairs and craft shows. People would often come to my booth, graciously admire my work, and then confess that they’d love to “make something” too, but didn’t know where to begin and wished there were some quick and easy starting projects available. After hearing this for a while, I took it to heart and began a line of craft kits. Each one included a simple project with clear directions and all of the necessary supplies. I tried to design fairly basic kits in such a way that the finished item would look a bit more difficult than it actually was! 🙂

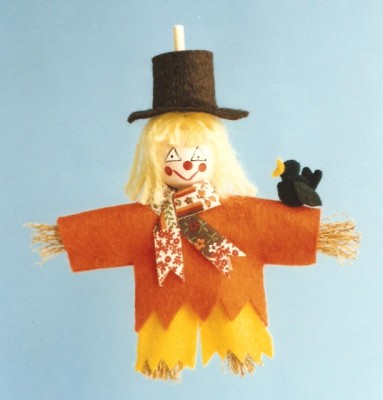
Since we are now smack dab in the middle of Autumn, I thought you might like to see one of those old patterns. It’s a mini scarecrow. This little guy is only about 6 inches tall! He’s made on a very small craft broom, which you turn into his straw body.

Scarecrowz

I no longer make the kit, but here’s a list of the supplies you need, along with full-size patterns and directions.

Use one as a focal point on a fall wreath, or make a garland of them to hang over a door! They’d be sweet decorating a napkin ring, or to dress up a hostess gift. You could even wear one as a pin on a coat (or a hat if you dare!).

mini broomThe mini craft broom needed should be available at your local craft store. It’s important to get the long and skinny style as shown to the left, not a broom that has a short, wide base.

Supplies Needed:

1 mini broom 5”- 6” tall (long/skinny style – see photo)
1 wooden bead (size: 20mm)
Small scraps of felt in brown, orange, yellow
6” piece of “autumn” ribbon for scarf
2 yd piece of fluffy yellow yarn for “straw” hair
fishing line for hanger
Tacky glue
Optional: tiny bird – either from craft store or one can be made from mini pom poms, black felt wings/tail, and yellow felt beak – as seen in photo.

For full-size patterns and instructions, click the link below:

Scarecrow Pattern

crystal-1b3-copy-flatfullwidth

12 Ornaments of Christmas – Pt. 2

The 2nd ornament in this series is a tiny glass ball that’s been jazzed-up with glittering crystals. The petite size of the ball is what makes this so adorable!

It’s elegant – yet easy-peasy to make.

For a pretty gift, I often like to use handmade ornaments to embellish items like a box of luxurious soaps, fancy chocolates, Christmas candy, or even scented candles.

Tiny Glass Bauble Ornament

5-3/4″ from end to end

bauble2

First you need some tiny glass ornaments. Since “size” is not usually indicated on the box, I’d say to look for something about as small as a melon ball. 😉 Hopefully there will be a pre-Christmas sale in progress where you shop!

bauble1

Of course, supplies can vary according to what you may have on hand . . .

bauble3b

But I used:

Mini glass ball ornament

a 14″ piece of Beadalon 19-strand, nylon coated beading wire

2 Silver crimp beads

Vintage Peridot Green and Clear AB glass/crystal beads in assorted shapes/sizes/colors

Glass Seed Beads 11/0 in “Silver-Lined Crystal”

4 glass beads 6/0 – Peridot AB

Coordinating linen cord (or ribbon) for bow

Simply string the beads (using the first photo as a guide), crimp both ends, and tie a bow!

Wouldn’t a bunch of these be gorgeous on the tree? 🙂

crystal-1b3-copy-flatfullwidth

12 Ornaments of Christmas – Pt. 1

Ok, I know. I KNOW!!! We may not be ready to think about the holidays just yet, but if you’d like to make gifts or decorations this year – time’s a wasting!

Today I’m launching a new series, “The Twelve Ornaments of Christmas”. Each week from now until Santa’s on the way, I plan to post a new ornament that I’ve made, along with the directions for you to make one too, if you like!

tennisshoezz

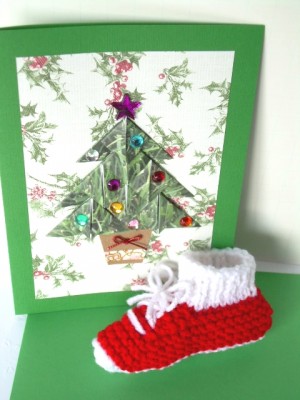
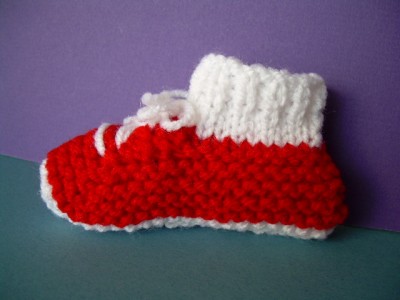
This week, I have a little sneaker, or “tennis shoe”, for the knitters among you!

DSCN4692

It was not very complicated and fairly quick to make with small scraps of yarn. I used holiday red but this would be cute in any color as a party favor, perhaps? I can imagine it filled with candy or a tiny stuffed animal and then set at each guest’s place for a birthday party or an after-sports event. You can find the pattern here.

It’s going to look adorable on the tree this year! 🙂

crystal-1b3-copy-flatfullwidth

There’s a Day for Everything

A couple of weeks ago, I was cleaning out a bureau where I store craft supplies and assorted sewing projects. One of the drawers has pattern pieces that have been cut from fabric, snippets of yarn and lace, and various items in different stages of work – most of them are nowhere near to completion. They’re leftover from the days I used to make dolls and ornaments for gift shops and fairs.

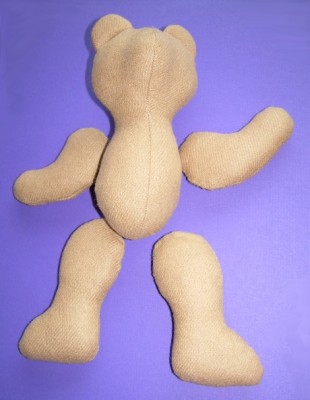
But at the bottom of the pile, I found these five pieces!

woolteddy

I had done the hard part long ago! It wouldn’t take much to finish the little guy. I remember that I made a bunch of them in cotton prints way back when, but this one is a fine wool in a pretty camel tan color.

Whenever my grandmother was working on something that she had put off for a long time, she’d always say, “There’s a day for everything!”

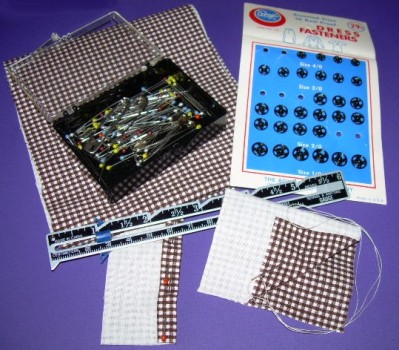
So, this was Teddy’s day. I decided to make a bow tie for him and found some dark brown gingham.

woolteddy2

Instead of the usual buttons, I chose tiny metal snaps for the eyes – mainly because I didn’t like any of the buttons I had on hand. Up until recently, I probably would have delayed finishing the bear until I could shop for the right buttons, but I have tons of stuff already and lately I’m thinking I should at least try to use something I have!

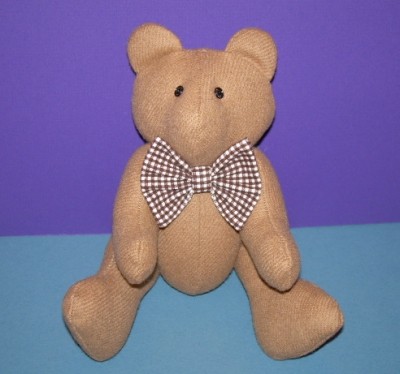
So here he is – all done!

woolteddy3

He needs a name. Any suggestions? 🙂

crystal-1b3-copy-flatfullwidth