12 Ornaments of Christmas – Pt. 4

toys2

Is it Friday, already? Wow, that was fast! OK then, for this week’s Friday Favorites, we have the 4th ornament in the series: “12 Ornaments of Christmas”. 😀

As you all know, there are lots of wonderful ideas for handmade ornaments out there. Some of them are incredibly detailed and take hours to make. I love that kind, and I’ve made a bunch of beautiful but labor-intensive ornaments over the years.

Sometimes though (especially if you want to make several new ornaments this season) it’s “Cute, Quick, and Easy” that you need! My goal for this series is to give you some choices that you can squeeze into your busy schedule while you’re doing all the things you usually do!

“Ribbon Candy”

RibbonCandy

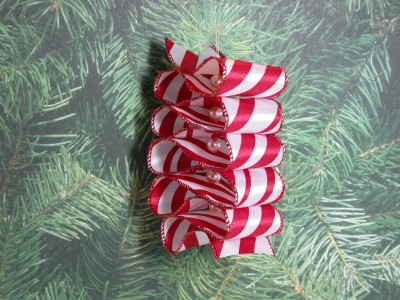
When I was a little kid, I was fascinated with ribbon candy! It was so pretty and colorful and the peppermint flavor was my favorite. This ornament takes me right back to the time when I was a wide-eyed child, mesmerized with the colorful lights, the smells, the flavors, and the wonder of Christmas.

With a few simple steps, you can make your own “Ribbon Candy” ornament. Whether you put it on the tree or dangle a few of them in different colors, and at different lengths, from the ceiling or a light fixture, I bet you’ll receive compliments!

christmastreeborder1

Ribbon Candy Ornament

Supplies for one ornament:

Wired Ribbon with Stripes, 1-1/2” wide, 1 yard
Ten Faux Pearls (8mm)
Quilting thread
Tacky gel glue or “Fray Check”
Sharp Needle that will easily pass through the hole in the pearl

Directions:

Quick Note: I found it helpful to pre-shape the ribbon ahead of time in order to estimate where the soft folds would fall on the piece of candy. In that way, I had a pretty good sense of how the finished piece would shape-up before I began to actually “sew” the folds in place.

1. Using a long piece of doubled knotted thread and the photo as a guide (Click on it for a closer look.), stitch thru the center of one end of the ribbon candy and then string the first pearl. (The pearls help to keep the folds of the candy slightly separate.)

2. Next, take a stitch through the center of the first rounded loop of the candy and then thread another pearl.

3. Continue in this manner until you have 5 loops on each side and have used all ten pearls. Your thread should now be coming out of the other end of the candy. Cut away any excess ribbon at this point. This will be the top of the ornament.

4. Pull the thread with a light tension and take a couple of tiny stitches to secure, but don’t cut the thread just yet.

5. Separate the two pieces of thread and let them untwist. Once the ends have untwisted fully, tie a knot at the top – this is now your hanging loop.

6. Use a toothpick (or a pin) to apply a very thin line of glue to the very edges of the ribbon to prevent fraying.

7. Finished! Isn’t it cute?!

christmastreeborder1

Maybe you’ll decide to experiment with wider or narrower ribbon, and/or substitute sparkling crystals for the pearls.

Have fun! 🙂

crystal-1b3-copy-flatfullwidth

Make a Mini Scarecrow

autumnYears ago, I used to sell a variety of handcrafted items at artisan fairs and craft shows. People would often come to my booth, graciously admire my work, and then confess that they’d love to “make something” too, but didn’t know where to begin and wished there were some quick and easy starting projects available. After hearing this for a while, I took it to heart and began a line of craft kits. Each one included a simple project with clear directions and all of the necessary supplies. I tried to design fairly basic kits in such a way that the finished item would look a bit more difficult than it actually was! 🙂

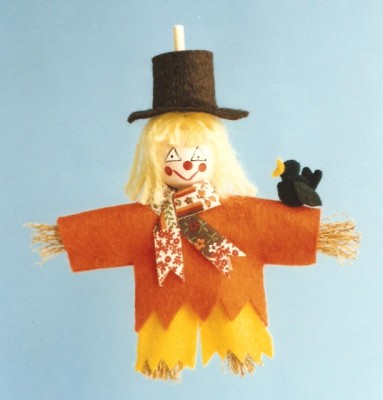
Since we are now smack dab in the middle of Autumn, I thought you might like to see one of those old patterns. It’s a mini scarecrow. This little guy is only about 6 inches tall! He’s made on a very small craft broom, which you turn into his straw body.

Scarecrowz

I no longer make the kit, but here’s a list of the supplies you need, along with full-size patterns and directions.

Use one as a focal point on a fall wreath, or make a garland of them to hang over a door! They’d be sweet decorating a napkin ring, or to dress up a hostess gift. You could even wear one as a pin on a coat (or a hat if you dare!).

mini broomThe mini craft broom needed should be available at your local craft store. It’s important to get the long and skinny style as shown to the left, not a broom that has a short, wide base.

Supplies Needed:

1 mini broom 5”- 6” tall (long/skinny style – see photo)
1 wooden bead (size: 20mm)
Small scraps of felt in brown, orange, yellow
6” piece of “autumn” ribbon for scarf
2 yd piece of fluffy yellow yarn for “straw” hair
fishing line for hanger
Tacky glue
Optional: tiny bird – either from craft store or one can be made from mini pom poms, black felt wings/tail, and yellow felt beak – as seen in photo.

For full-size patterns and instructions, click the link below:

Scarecrow Pattern

crystal-1b3-copy-flatfullwidth

12 Ornaments of Christmas – Pt. 3

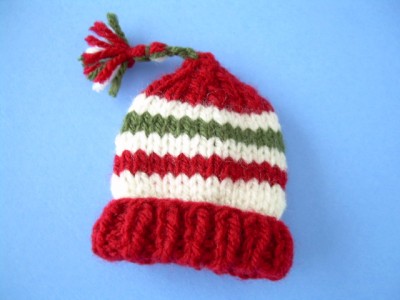
The 3rd ornament in this series is a miniature winter hat! It measures just 2-1/2″ tall – so sweet!

Now please don’t worry if knitting isn’t your thing, because this will probably be the last knitted ornament that I present this year. I wanted to make it now while I still had my yarn and knitting needles handy, but next week I’ll be moving on to another craft. 🙂

Tiny Knit Hat with Tassel

knithat

So here we have another quick and easy design – only basic skills required. The pattern (found here) also includes several variations if you’d like more of a challenge. There’s an adorable Aran knit, for example.

In the interest of speed, I chose this striped style and then decided to add a tassel instead of the standard pom pom – just to shake things up a bit. 😉

A collection of these little hats would be darling on the tree, but they’d also make great package tie-ons or party favors. In the pattern photo, there’s even one “dressing-up” a gift bottle.

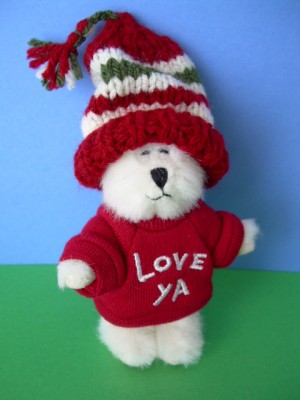
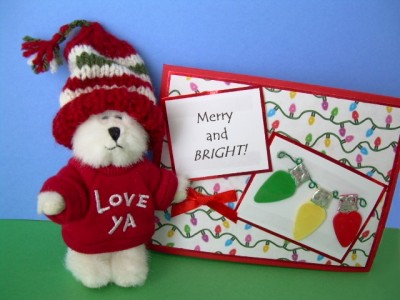
But then, you might have a mini bear who’d be delighted to keep snuggly warm this winter in a slightly over–sized hat!

Bear1a

Bear2aa

crystal-1b3-copy-flatfullwidth

12 Ornaments of Christmas – Pt. 2

The 2nd ornament in this series is a tiny glass ball that’s been jazzed-up with glittering crystals. The petite size of the ball is what makes this so adorable!

It’s elegant – yet easy-peasy to make.

For a pretty gift, I often like to use handmade ornaments to embellish items like a box of luxurious soaps, fancy chocolates, Christmas candy, or even scented candles.

Tiny Glass Bauble Ornament

5-3/4″ from end to end

bauble2

First you need some tiny glass ornaments. Since “size” is not usually indicated on the box, I’d say to look for something about as small as a melon ball. 😉 Hopefully there will be a pre-Christmas sale in progress where you shop!

bauble1

Of course, supplies can vary according to what you may have on hand . . .

bauble3b

But I used:

Mini glass ball ornament

a 14″ piece of Beadalon 19-strand, nylon coated beading wire

2 Silver crimp beads

Vintage Peridot Green and Clear AB glass/crystal beads in assorted shapes/sizes/colors

Glass Seed Beads 11/0 in “Silver-Lined Crystal”

4 glass beads 6/0 – Peridot AB

Coordinating linen cord (or ribbon) for bow

Simply string the beads (using the first photo as a guide), crimp both ends, and tie a bow!

Wouldn’t a bunch of these be gorgeous on the tree? 🙂

crystal-1b3-copy-flatfullwidth

Easy Gifts to Make

We may be in the midst of the “computer age”, but sometimes you just need a piece of paper handy for jotting down a quick note, or a list, or a message.

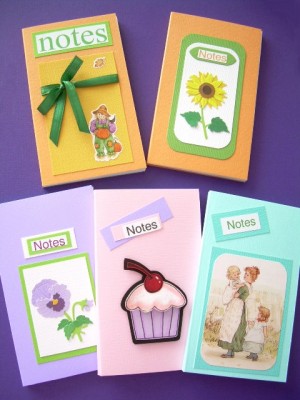
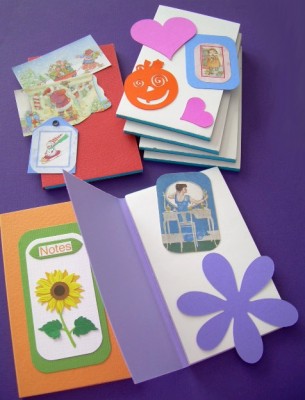
Recently, I made some decorative notepads and I thought you might like to see them!

notepads

They cost only pennies to make. The main ingredient is a 12-pack of small white notepads. Add colorful cardstock covers and then embellish them as elaborately or as simply as you choose! I had so much fun with these. What cute little gifts or stocking stuffers they’d be!

notepads1

Clenna has requested some ideas for crafts to make with children to be used as gifts for their parents, grandparents, etc. This might be a good project to work on with the kids – as long as an adult supervises the use of scissors! A child could even showcase some of his/her own drawings for the cover art. Grandma would surely love that!

I can take no credit for the original idea here. I found it months ago, bought the supplies, and have just now had the chance to actually make some. In one of my previous posts, I blogged about the talented designer and included a link to her video tutorial, where she gives complete directions and measurements. You can find it here.

So now I can’t wait to make notepads for Halloween, Thanksgiving, Christmas, Valentine’s – well, you know what I mean!

I’d love to see any that you make, too! 😀

crystal-1b3-copy-flatfullwidth